VPN usage has increased dramatically in the past year, and there’s a reason for that. In 2025, data security is more important now than ever before. But just because you’ve decided to use a commercial VPN doesn’t necessarily mean that your data is safe. And here’s why…
With a commercial VPN, especially if you’re using a free one, you have no control over the endpoints involved. They’ve got to make their money somehow, haven’t they? So rather than relying on a commercial VPN that’s either charging you or, more worryingly, isn’t, you can host your own VPN and take complete control over your data security.
Getting started
In this guide, we’re going to tell you how to purchase a VPN, and how to select its operating system and location to make sure you’re getting the right platform.
In order to get started, you’re going to need 2 things – a computer that you can access a virtual private server from and a virtual private server, ideally running Linux, because that's what we'll be focusing on in this guide. For the purposes of this tutorial, we’ll be using one of our own VPS.
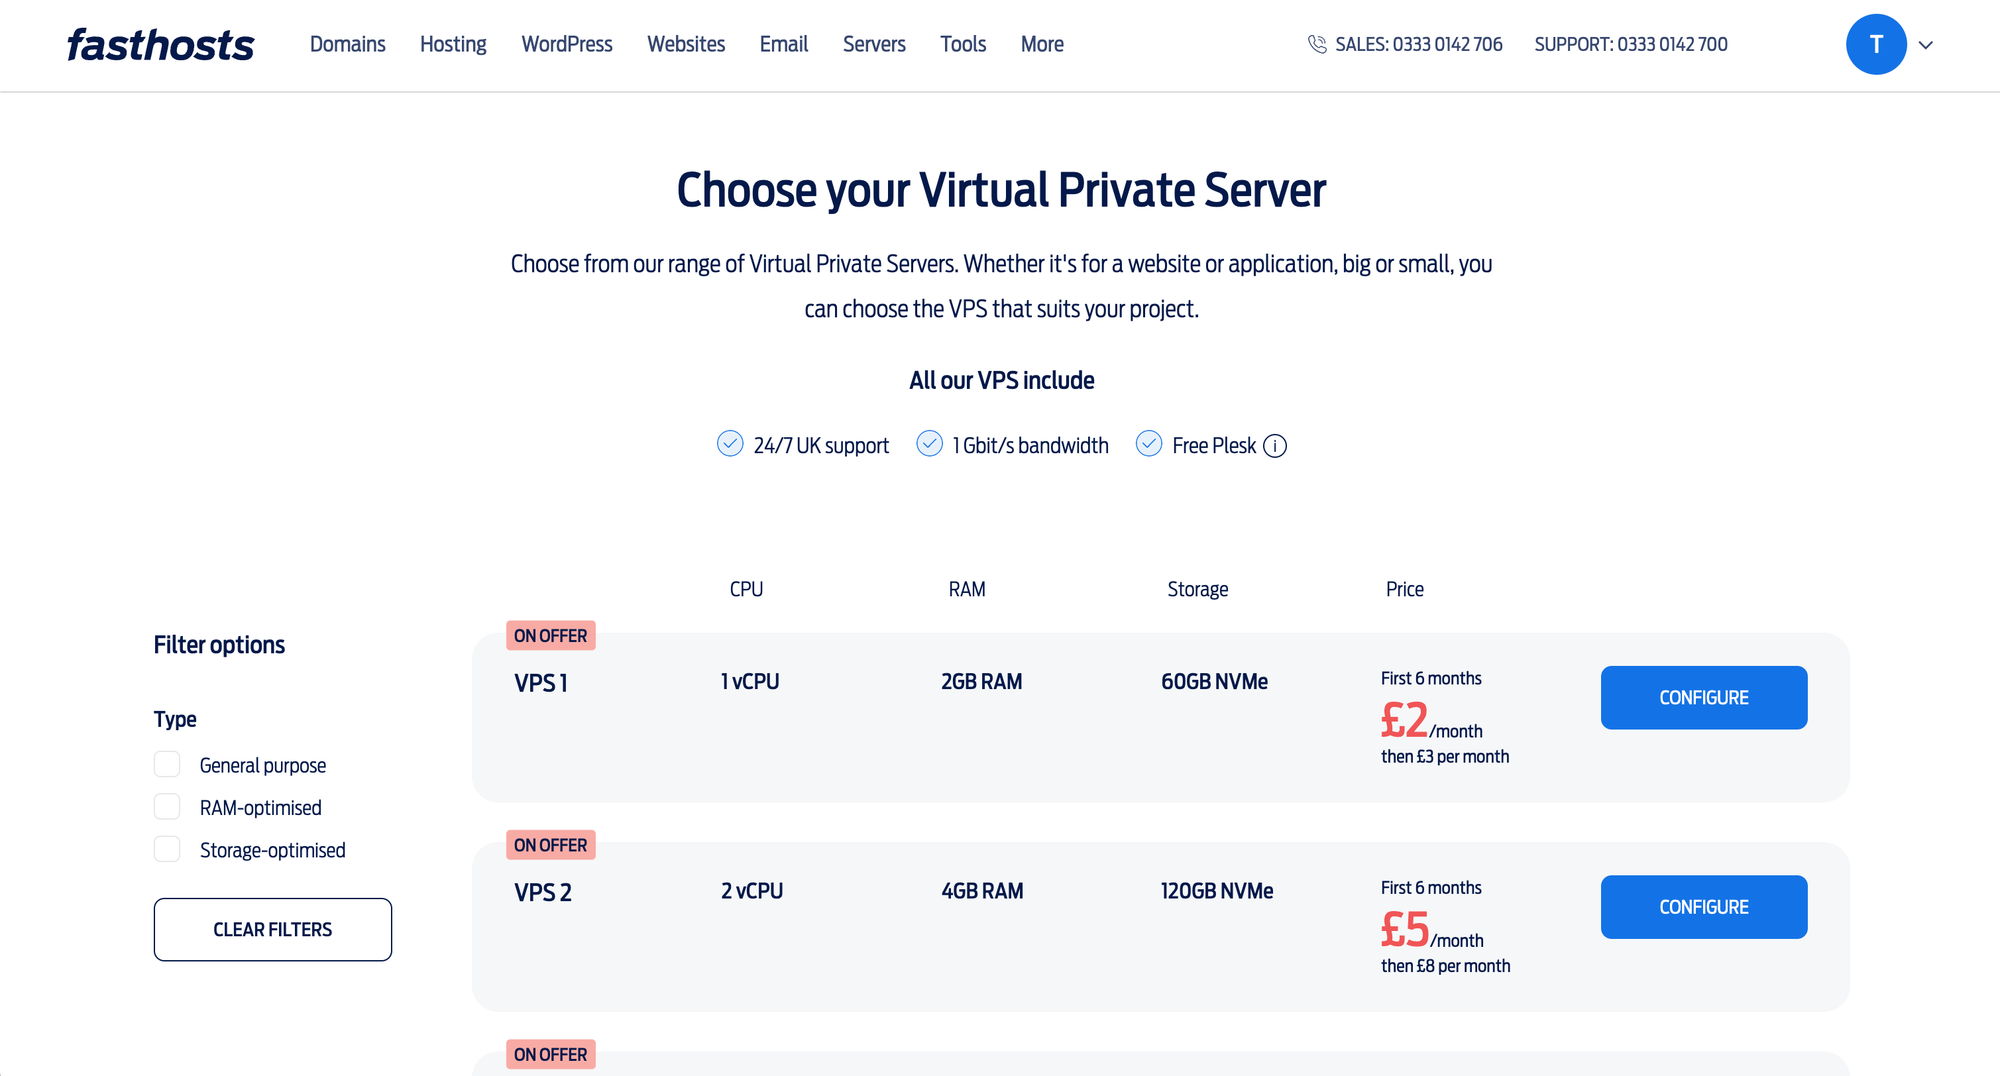
If you’re already logged in when you head to the Fasthosts website then as soon as you choose your VPS it’ll add it to your account. But if you’re not logged in or you don’t have an account, don’t panic! When you start to add the service, you’ll be prompted to log in or create one.
Choose your VPS from the selection available and make your purchase.
And now we can start creating your VPN!
Creating your VPN
The next thing you need to do is log into your new VPS. To do that, you need to use an SSH client. If you’re on Mac or already running a Linux device, you can just use the terminal application that’s already installed on your device.
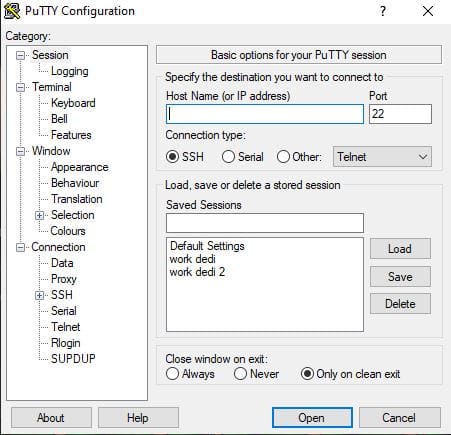
If you’re on Windows, you can use the command line if you want to, but we’d recommend using Putty instead. Putty simplifies the process and is easy to download. All you’ve got to do is head to this link and hit install. For a full step-by-step on how to install, check out our YouTube video.
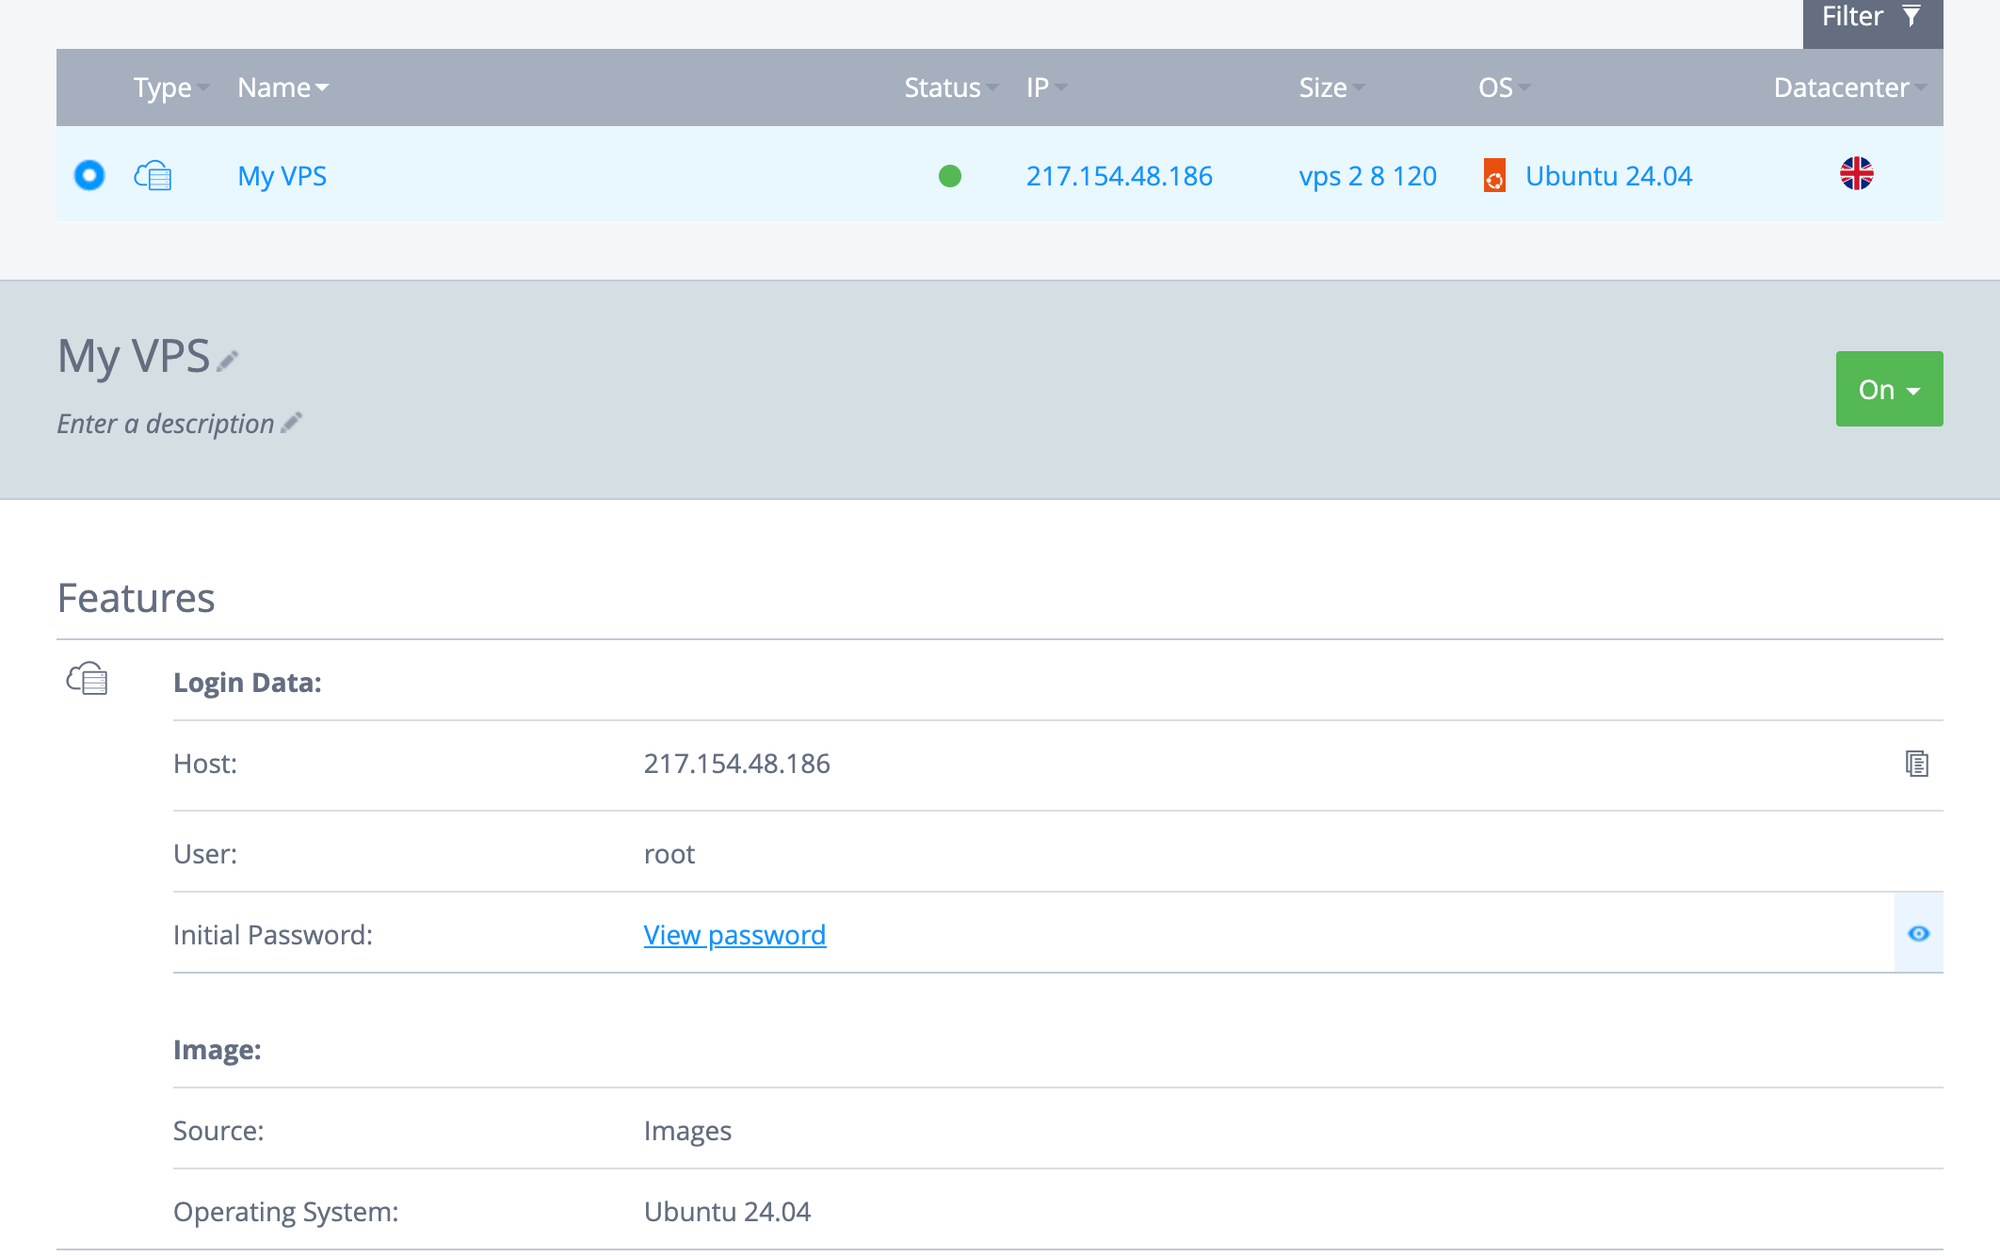
So now you need to look at the connection information for your VPS. Go to the VPS page of your control panel, as seen in the image above, and click on the name.
This will take you to the server control panel. Click on the server again to open up the information and copy the host value (the IP address).
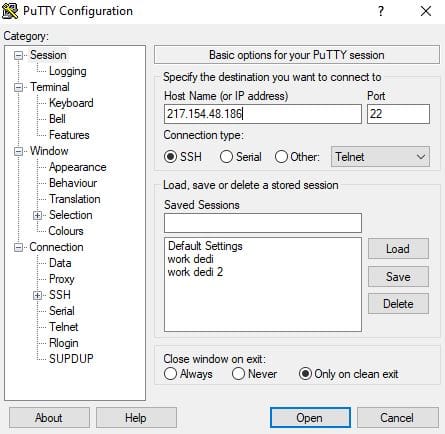
Then, go back into Putty, open up the text box, paste the IP address and click connect. This will open up a terminal interface where it’s starting to connect the server.
It should then ask for a username. For this, type in ‘root’. Press enter, and it’ll ask you for a password. Head over to the password section on your server control panel, copy and right click to paste back into Putty.
Once you press Enter again, you’re connected to your server.
The next thing you want to do is type in the below command:
apt update
It’ll scan all of the repositories for any updates to the local operating system. This is something you’ll definitely want to do for every new server, as it means all the security patches have been done. It’ll also tell you after this if any packages need upgrading. If there are, type in the below command:
apt upgrade
Once that’s done, you’ve now got an up-to-date server that’s ready to go!
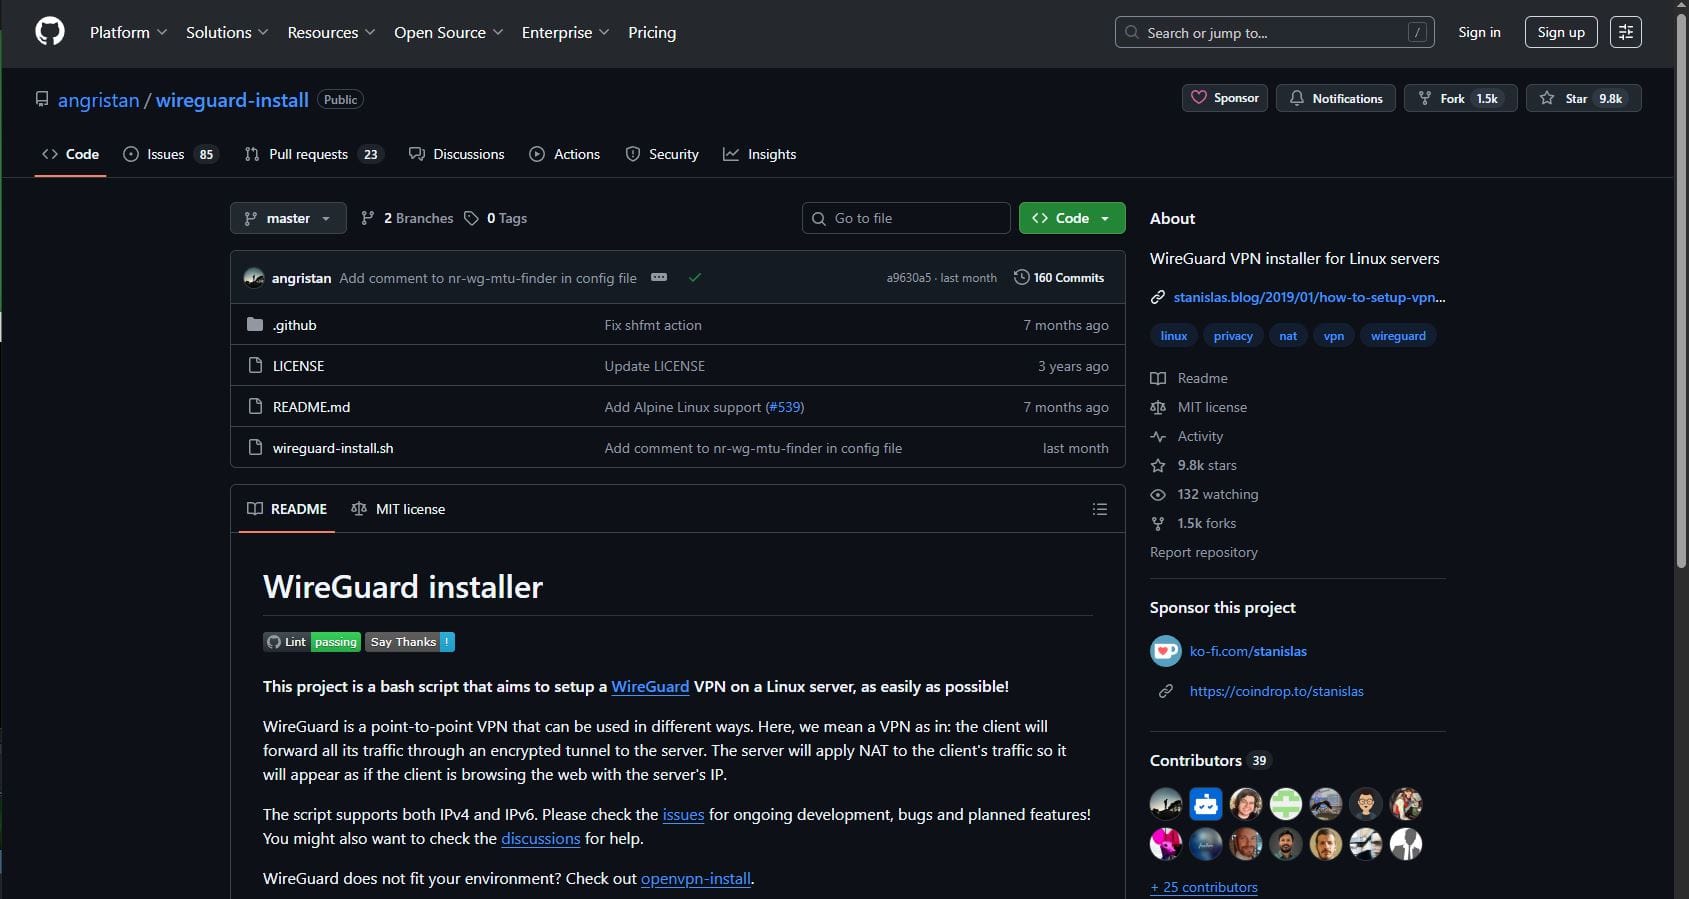
The software we’re using to install the VPN in this guide is called WireGuard. This is an open source software that allows you to set up a VPN. Instead of installing WireGuard manually, you can use the community resources that are available. Follow the link here to go to the GitHub page for installation script. It’s worth noting here that there are of course always risks when running random script you find on GitHub. In this case, that risk is relatively low as this is highly recommended, but just something to keep in mind when you do this.
This script will turn the manual installation process into a wizard-type process, asking you the information rather than having to input the information yourself.
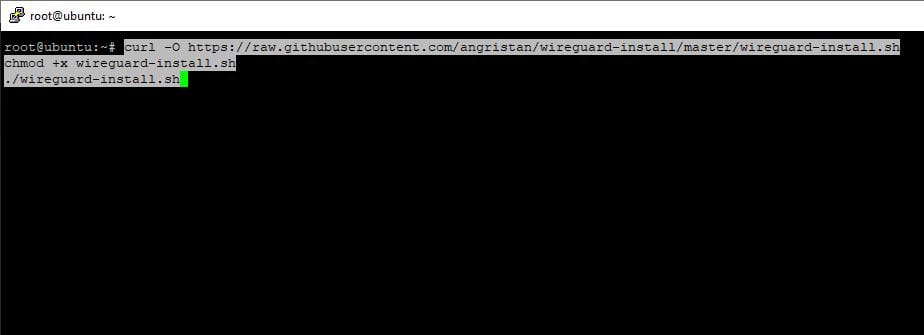
Copy the curl command under ‘Usage’ into your terminal. This will install the WireGuard installation script.
It’ll then ask you a few questions. In most cases, the default value will be the answer you need, so you can just press ‘Enter’. For a full view of these, head over to our YouTube video.
Once that’s done, it’ll set up the WireGuard VPN for you – and it’s super quick! Type in a Client Name, which can be whatever you like, and then your VPN will be active!
The QR code that displays will then allow you to set up your VPN on whatever device you like. You don’t have to use the QR code, you can actually take the config file and put that onto the device you’d like the VPN on. So it doesn’t just have to be used on mobile.
Setting everything up
We’re now at the point in our guide where you need to set up the client – the device you’ll be connecting to the VPN with.
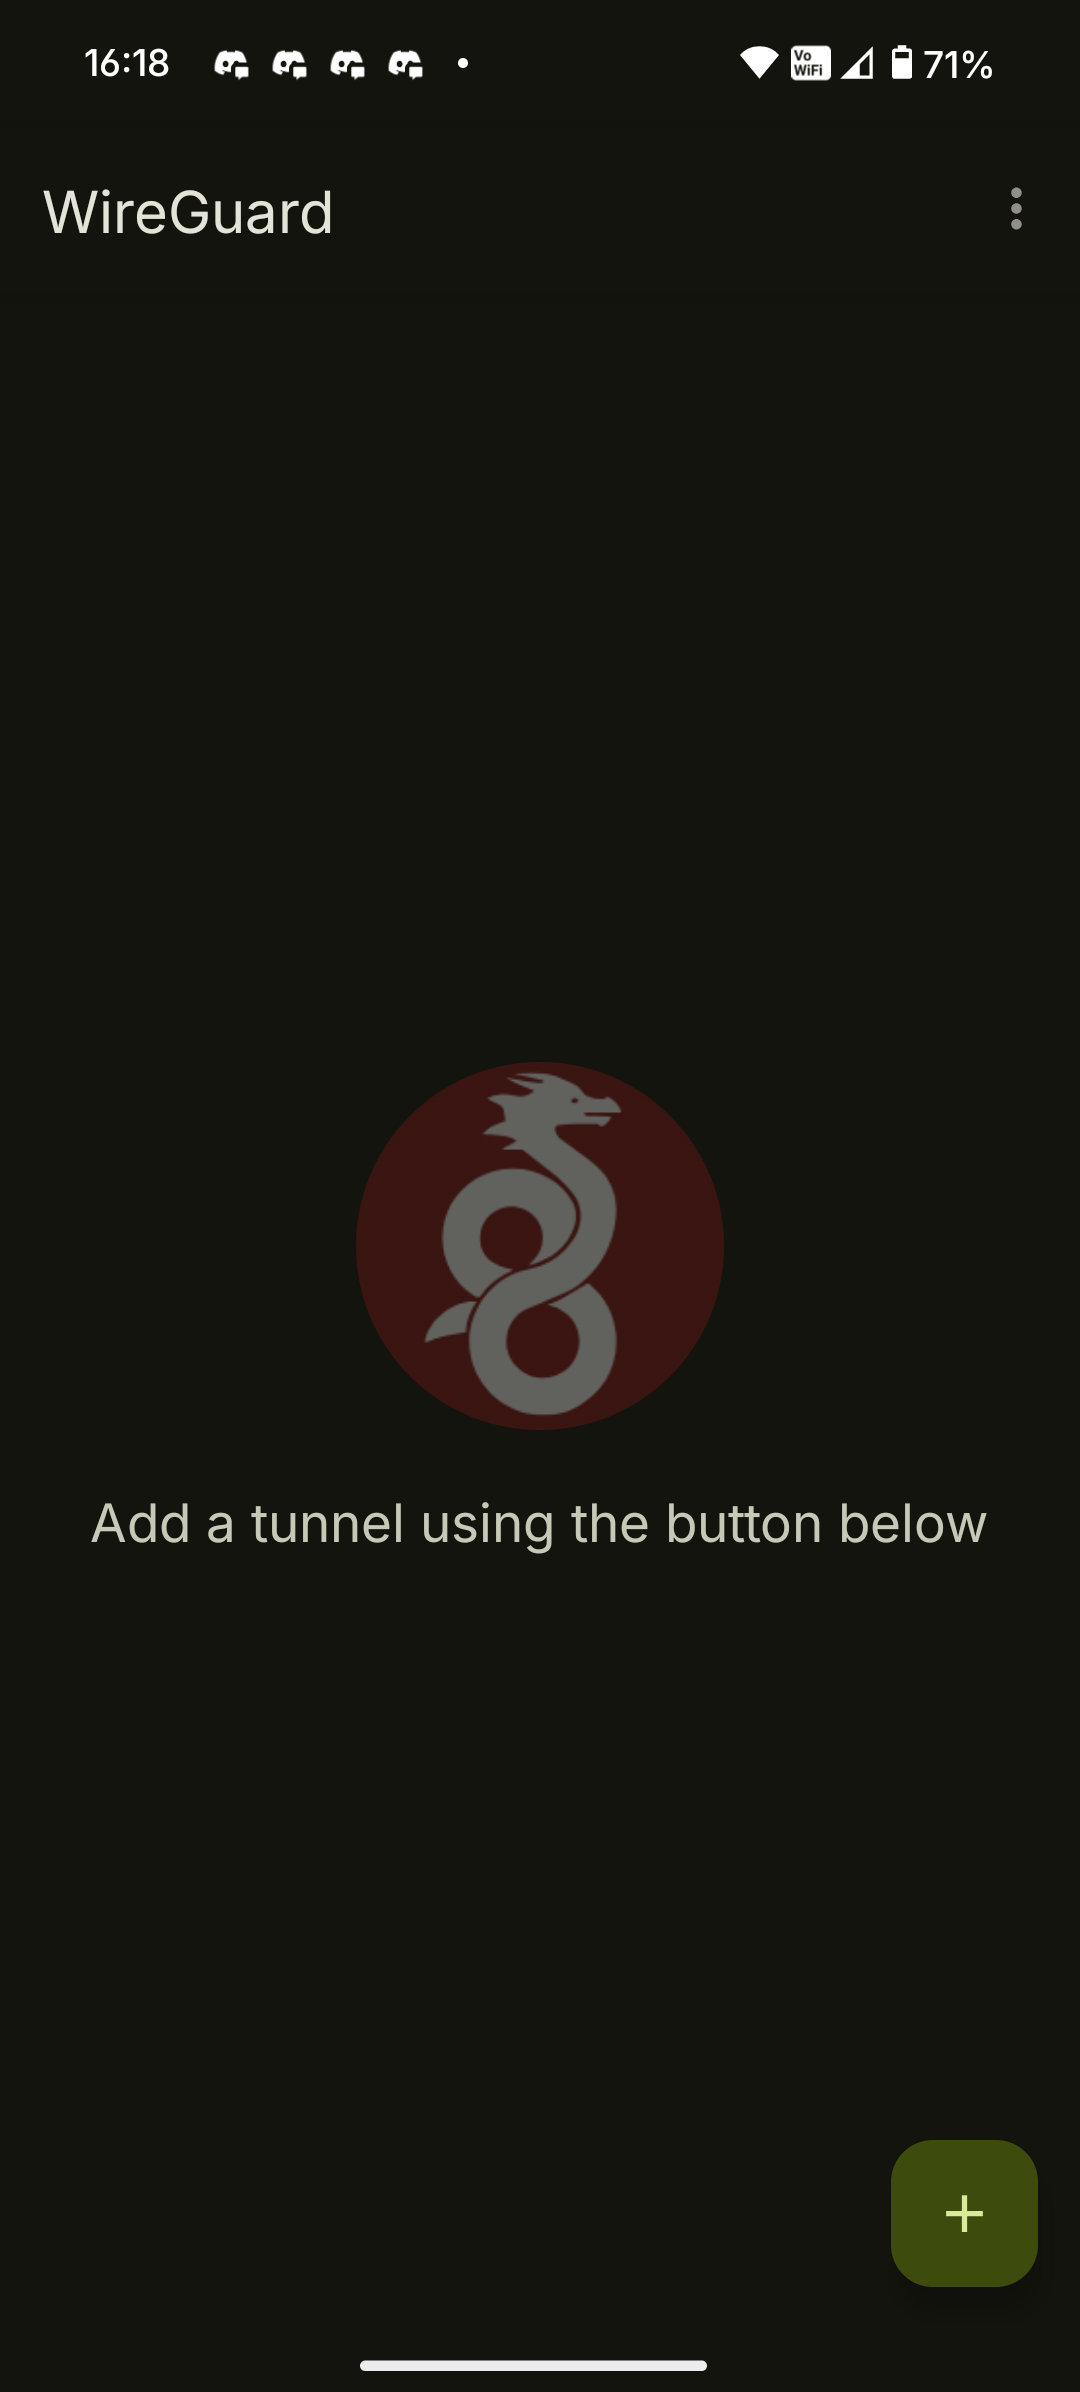
Head to the app store on your phone and install WireGuard. The first page you’ll see will be blank, with a plus symbol at the bottom. Here you can either scan the QR code or import the config file.
Once you’ve scanned the code, you’ll then be asked to provide a name. This can again be anything you like. Click ‘Create Tunnel’ and your client will have been created! This will now allow you to connect to your VPN – it’s really that simple!
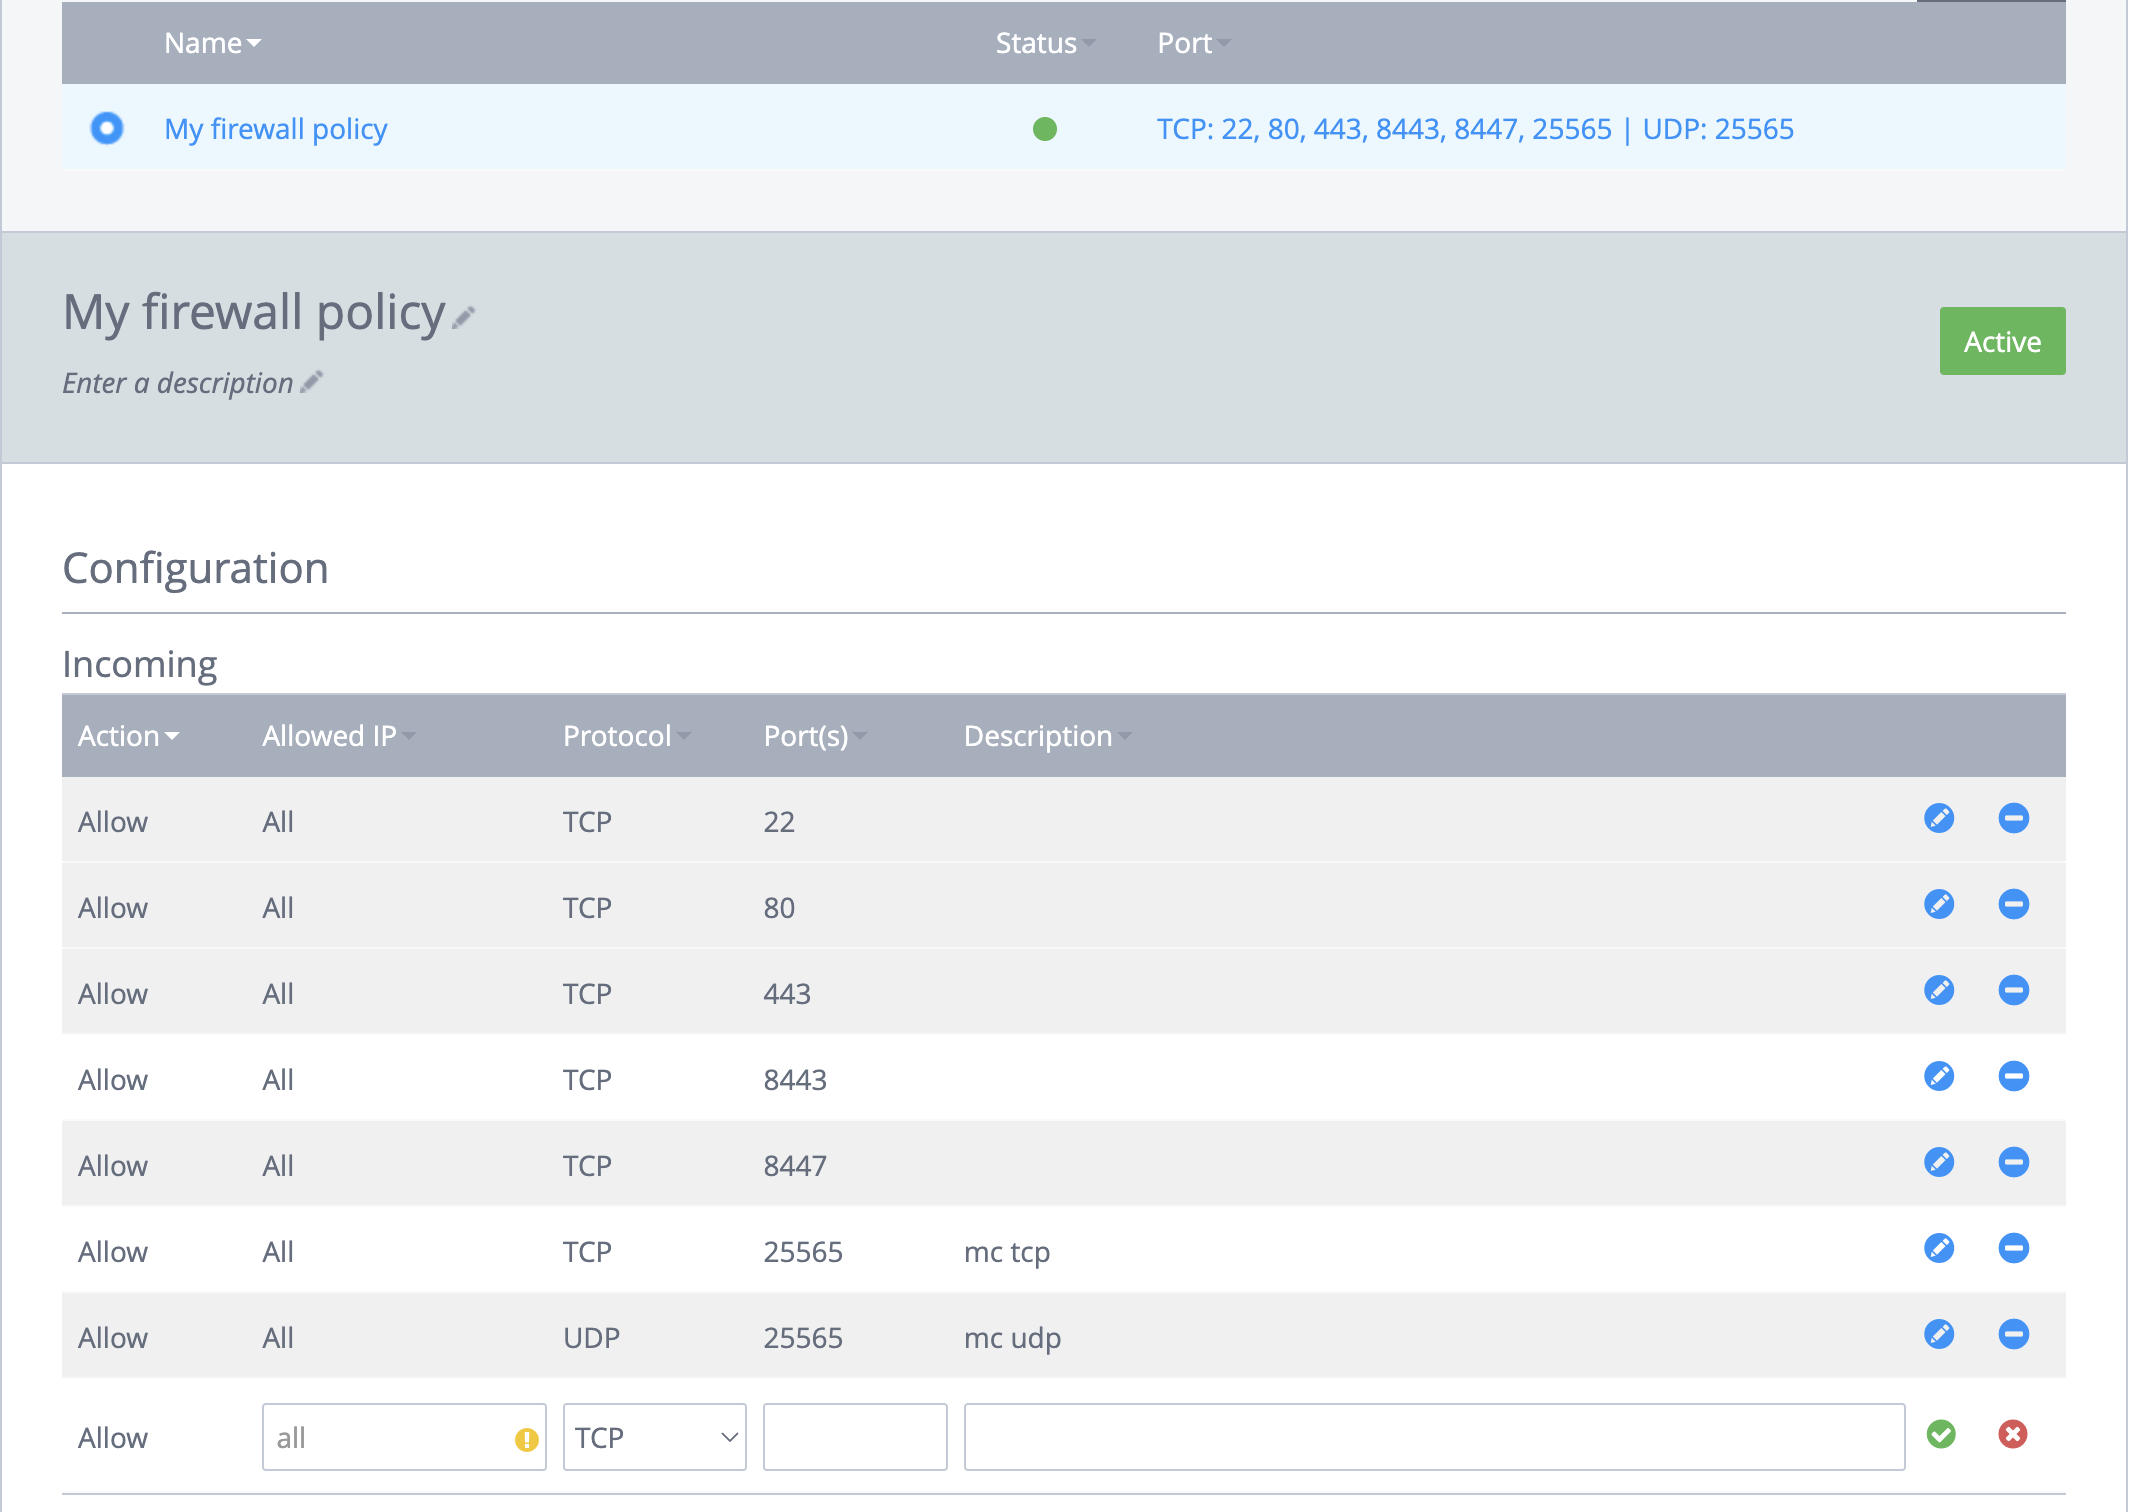
The last thing you need to do is check that the ports are now all open for the VPN so that it’ll all be able to connect nicely. For this, you need to head back to your server page in the Control Panel. Go to Firewall Policies under ‘Network’ in the menu on the left and open up the Firewall Policy on your server. You’ll then need to enter the Port number which was shown earlier on when you set up the VPN. If you didn’t make a note of this, don’t worry! You can go back to your terminal and scroll up to find it. It’s also worth noting that you need to make sure you select UDP as the protocol at this stage.
You can give it a brief description, which can be anything, and then click the green tick to ‘Add rule’. Once that’s showing as green, you can now test your VPN!
And that’s it! Of course, if you prefer a visual tutorial you can check out our YouTube channel for the full video. We’ve also got tons of other great guides and videos over there, so be sure to have a little browse.
As always, if you have any trouble, need to ask a question or are curious about our other products, our team is on hand 24/7 to help. Just give us a call on 0333 0142 700 or message us via live chat.
