As part of the launch of the new 'Professional' mailboxes we’ll also be introducing a free mailbox migration tool for customers to use to move their mailbox from external providers to ourselves. This migration tool can also be used to migrate to our Exchange Email.
So if your current provider just isn’t doing it for you anymore, it’s not a problem. We make it simple to move your mailbox. Just don’t forget to back it up! But don’t worry – in this blog, we’ll go through exactly how to migrate to us for free, showing you just how easy it is.
Step 1: Getting started
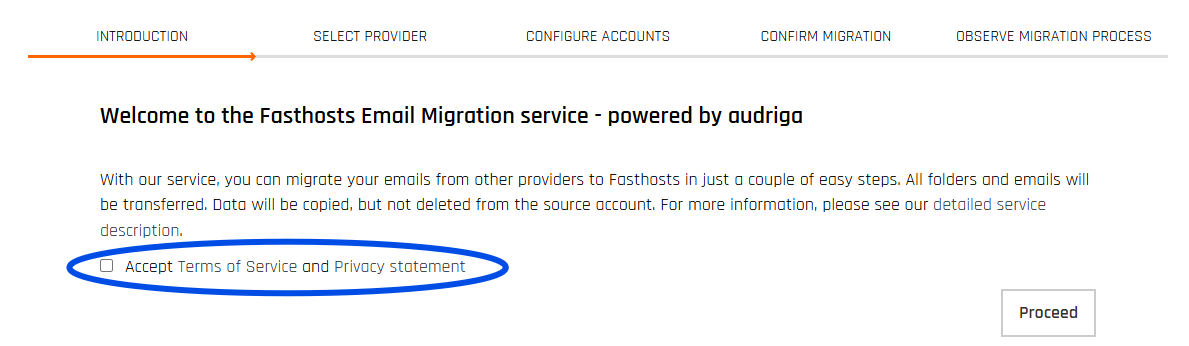
The Fasthosts Email Migration Tool is your step-by-step guide to migrating your mailbox to us. We’ve made it as easy as possible to do this, with no complicated forms or phone calls. In just 6 steps you’ll be sending emails again like a pro!
But first things first, you need to do the boring bit – accept the Terms of Service and Privacy Statement. Once you’re happy, you can click ‘Proceed’.
Step 2: Choose your provider
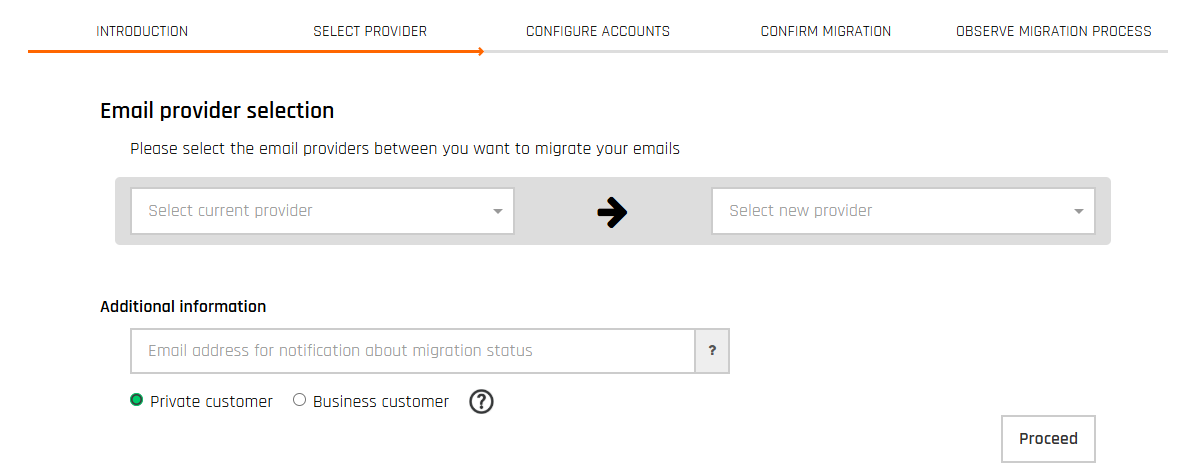
Here you’re telling the tool where you’re moving your emails from and where they’re going. In the first dropdown, you need to select your current provider. If you can’t see yours in the list, choose ‘Add missing provider or server’. You can also choose ‘Suggest a missing provider’ if you think that could benefit other customers.
In the second dropdown, choose your Fasthosts mailbox type. Click ‘Fasthosts’ for standard IMAP mailboxes, or ‘Fasthosts (Exchange)’ for Microsoft Exchange mailboxes.
Now you need to enter the email address where you’d like to receive notifications about your migration progress and completion. You’ll also need to let us know if this is a personal email or business, but selecting the relevant tick box at the bottom of the page. Once you’ve done this, you can proceed to step 3.
Step 3: Configure your accounts
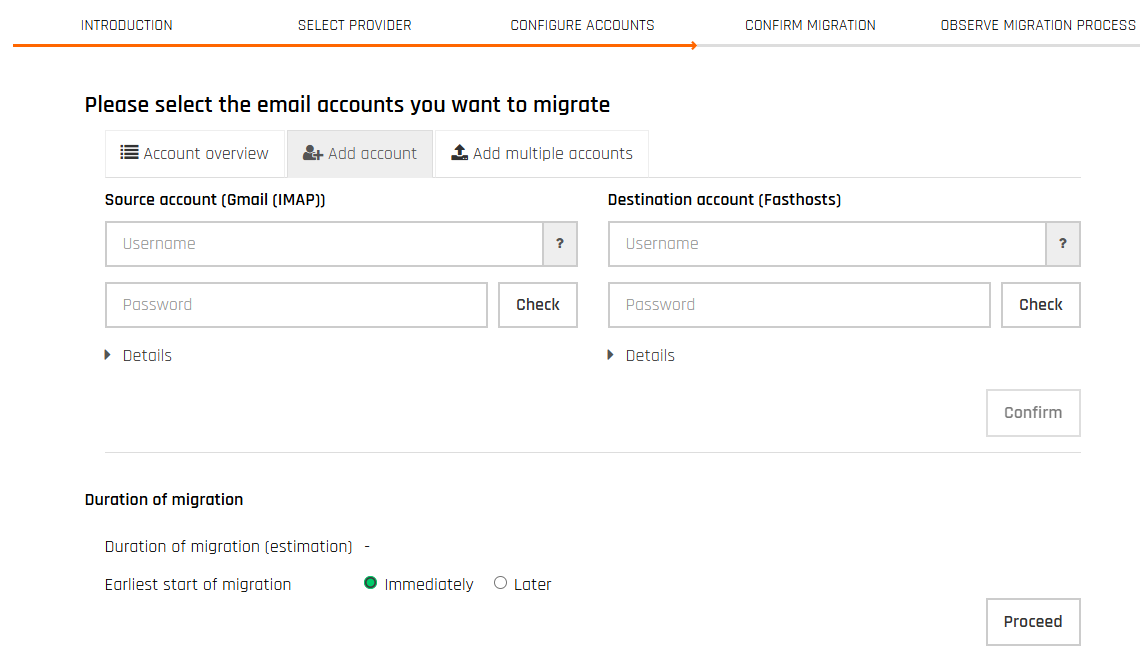
You’ll now be asked to provide the login details for both the old (source) and new (destination) email accounts. Type in the username (full email address) and password for the mailbox you’re migrating from and to. Check to verify the details. If an error shows, first double-check that the login information is correct. If it is, you may need to reset the password for the ‘problematic’ mailbox.
Once both accounts have been verified, you can click ‘Confirm’. This will add the account pair to the migration queue.
If you need to add more accounts, repeat step 3 for each additional account.

Step 4: Schedule your migration
At the bottom of the configure page, you’ll see ‘Duration of migration’. Under ‘Earliest start of migration’ you can either ask it to start immediately, in which case migration will begin as soon as the next step is completed, or later. If you choose later, you’ll be able to select a specific date and time.
Step 5: Confirm and migrate
Once you click ‘Proceed’ you’ll be able to see a full summary of the migration plan. Check over all the details carefully before you go any further. Once you’re happy, click ‘Start migration’.
Step 6: Migration
Great news – you’ve reached the end and your migration will now begin (unless you’ve scheduled it for later, in which case it’ll start when you’ve specified).
On this page you’ll be able to see the live status of your migration. It’s safe to close the page though – the migration will continue in the background and you’ll receive an email notification to your specified email address when it’s complete.
Easy, free migration
And that’s it – your free email migration is complete and you can now enjoy your mailbox with Fasthosts. Of course, if you have any questions or need some help getting started, our Support Team is available 24/7 to help. Give us a call on 0333 0142 700 or message us via live chat.
We’ve also got lots of helpful support articles which cover everything from migrating your email to setting up a new one and much more.